How I built my Kubernetes Homelab – Part 7
Welcome to the last part of this series about how I built my Kubernetes Homelab. In this part we will continue with the configuration of Kasten K10. In the dashboard we see three main boxes named Applications, Policies and Data. As mentioned earlier for Kasten K10 Applications are defined by a namespace. In Policies you will find only one backup policy, if we have configured K10 Disaster Recovery like in my last part of this series. In Data you will see your used space separated by Snapshot Storage, Object Storage and the persistent volumes in the cluster. All charts have also historical data.

Backup
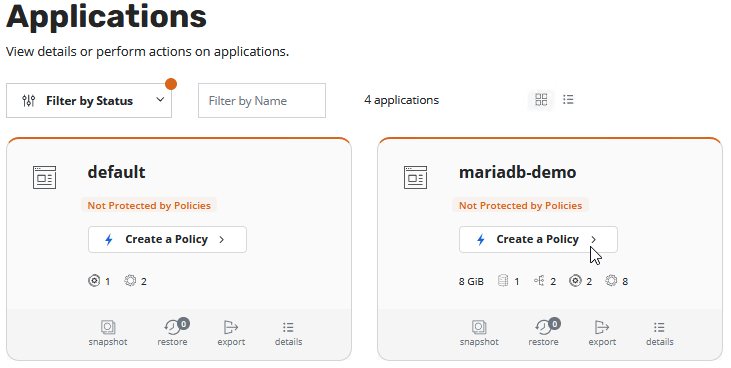
In German we have a saying “Many roads lead to Rome” and here, of course, there are many ways to perform the configuration. You can do the configuration via kubectl commands, in Policies or how I will create it via Applications. I have in my lab created a small demo application with an MariaDB and phpMyAdmin. If you are wondering why MariaDB and not mySQL is used I have to admit that since I created the part with my demo application something has broken the mysql helm chart, so I had to switch to MariaDB. We click on “Create a Policy” to create a new policy.
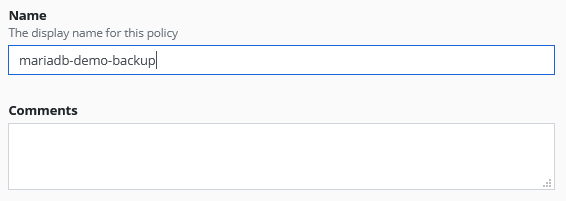
Ok, lets start with easy stuff. We need to choose our Policy Name. The name for this policies are only allowing lower case letters, numbers, “-” and “.”. Otherwise this will not be a valid Kubernetes object name. Some people write novels into such a field at their e.g. Veeam Backup & Replication Console but here we are the guest in the house and need to follow the house rules. If you need to add more infos to the policy it makes sense to write it in the Comments field.
After this you can enable backups on a variety of backup frequency like hourly, daily etc.
But you can also define for all Advanced Options like. e.g. which minute of an hour and of you want to use Local Time or UTC.
What I like was that you get below the selected schedule an detailed textual description of the selected options.
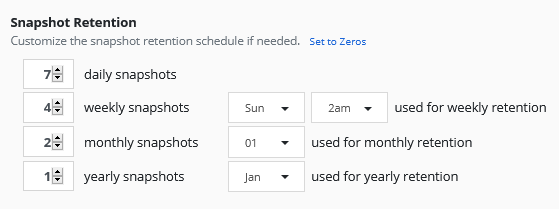
After this we need to select how many snapshots we want to store. This snapshots are stored in my vSphere CNS and are fast created.
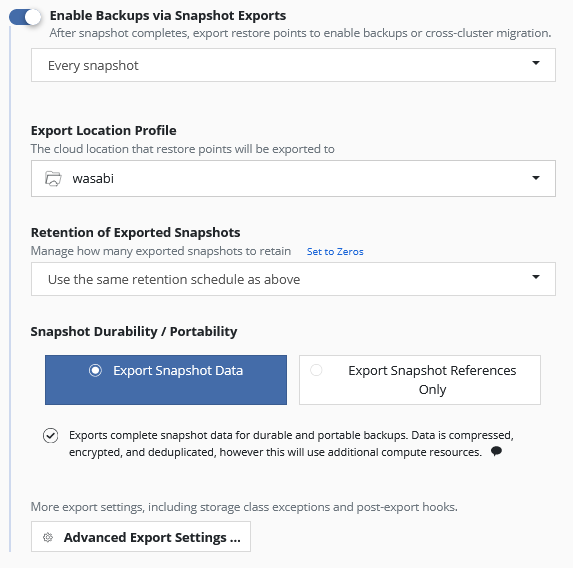
If you only want to create snapshots with Kasten you don’t need to activate this section, but a Snapshot is not a Backup and that’s why we enable it.
We need to select an Export Location Profile. In our case we select the “wasbi” Location Profile, which we have created in the last part of this series.
The Retention of Exported Snspshots are by default configured to use the same retention schedule as above, but you can change it. You can have e.g. a few snapshots configured and keep a longer history of backups which was exported to object storage.
All backups stored to object storage will be encrypted by default. The encryption key will be autogenerated while installation or you can preconfigure/change later your own encryption key.
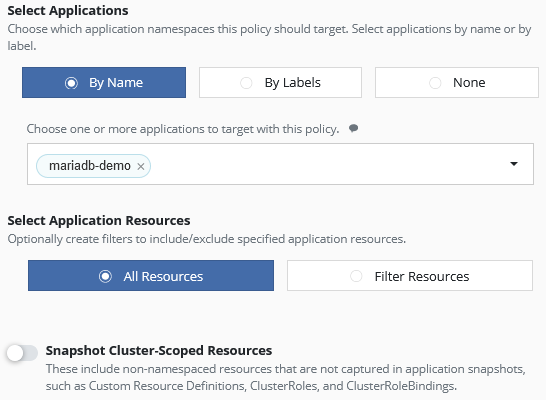
In this section you can select what data you want to backup. In our case we select our application “by Name” (namespace), but you can also “by Labels”. In our case we only want to backup one namespace, but if you want to backup serveral namesspaces you can add them as well.
You can backup all ressources or filter the ressources with exclude and include filters, if this is needed in your environment. We will here just backup all resources.
Some resources in Kubernetes are not in Namespace. This non-Namespace Resources are called Cluster-Scoped Resources. An example is a storageclass. Our storageclass “nas-sc” can be used by any namespace. You can backup Cluster-Scoped Resources with this policy or normally it is an own policy with “None” for the application selection.
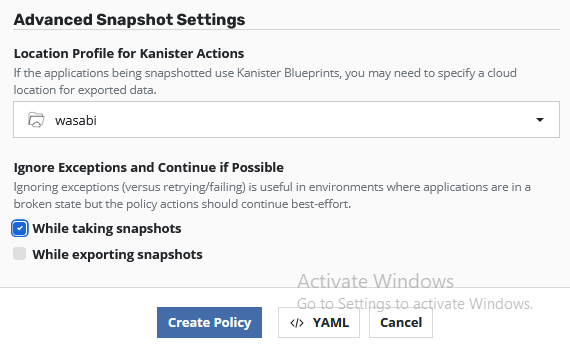
If we later enable Kanister Actions we need to set a Location Profile for e.g. database dumps of our MariaDB. This is needed because normal snapshot and exporting this snapshot as backup didn’t care about the application data consistancy.
With Kanister you can enable Blueprints which e.g. dump a database for logical consistency or (un)quiesce a database / application for a backup. The capabilities depends on the used application and if somebody already created a blueprint.
Now we can just click on “Create Policy” to create the policy.
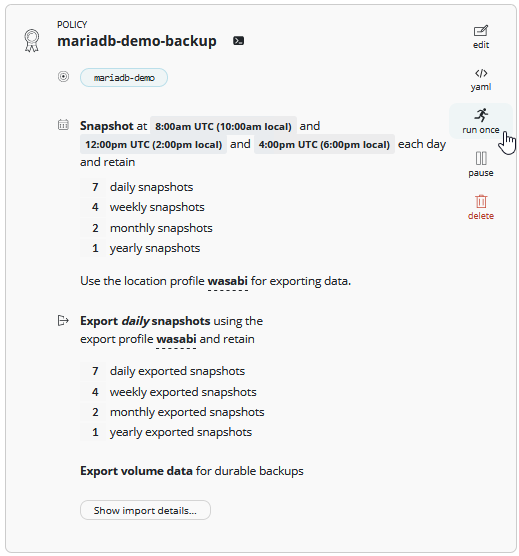
Now you will redirected to the “Policies” section. Here you find for all configured policies such blocks with the important configuration settings. You can edit here the policy, view the yaml file (yes, you can also configure change polcies via yaml), start an immediate snapshot/backup, pause this policy or just delete the policy.
We select now “run once” to start the policy.
When you go back to the Dashboard and scroll down you will see the running policy, first will obviously the Backup finish. After this the Backup will be exported to S3. Keep in Mind that here we have no application consistency. I would call it Crash-Consistent.

If you need an Logical Backup or just an Application Consistent backup you can use the Kanister integration of Kasten K10. Kanister is a framework for data management on Kubernetes.
Because MySQL and MariaDB only have the option to create a Logical Backup (Dump). We need to add with kubectl the Blueprint for MariaDB to our Kasten K10. This blueprint can be used for maybe several database pods and is build to get the necessary options from the namespace objects where e.g. the database pod resides.
marco@lab-kube-m1:~$ kubectl --namespace kasten-io apply -f \
    https://raw.githubusercontent.com/kanisterio/kanister/0.51.0/examples/stable/maria/maria-blueprint.yaml

blueprint.cr.kanister.io/maria-blueprint created
After adding the blueprint to our kasten-io namespace, we need to add an annotation to the statefulset of mariadb. Next time when Kasten K10 creates a snapshot, it automatically create a MariaDB database dump.
marco@lab-kube-m1:~$ kubectl --namespace mariadb-demo annotate statefulset/mariadb \
    kanister.kasten.io/blueprint=maria-blueprint

statefulset.apps/mariadb annotated
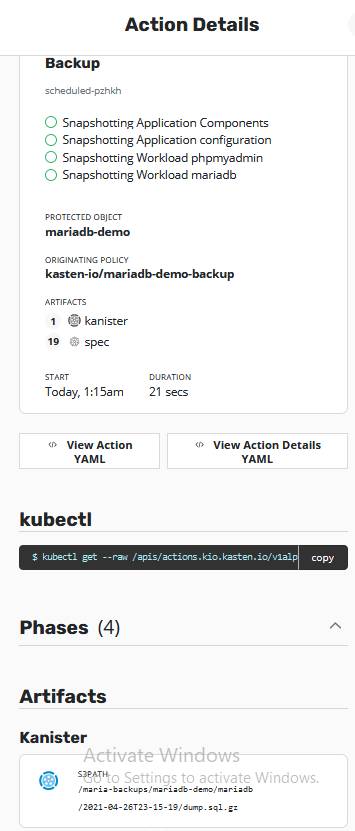
Here we see the Action Details. An action can be an backup or export and we see here all 4 phases of this Backup. Take here a closer look to the Artifacts and especially the Kanister artifact. You can see here that Kanister has created a dump of the SQL databases to the configured S3 storage (in our case Wasabi)
I just checked my S3 storage and just copied the dump file to my local disk and was able to open and read the data.
That’s all for the backup part. Now we can restore the backup.
Restore
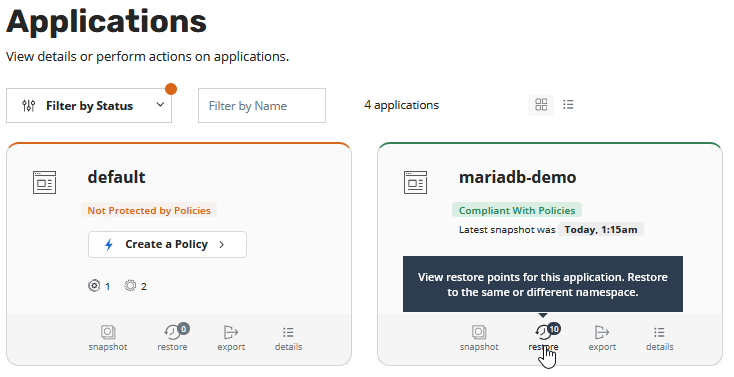
To restore our demo application to an old state we need to switch to the Application section and select “restore” for our application.
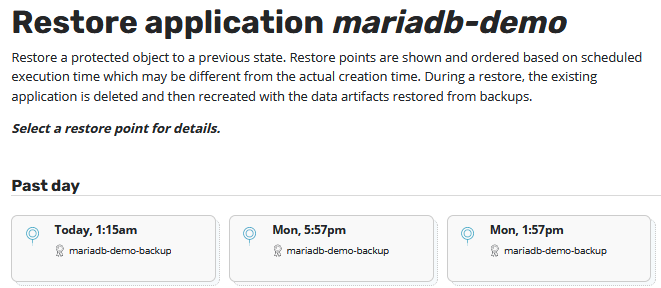
Now we can se all available restore points for this application.
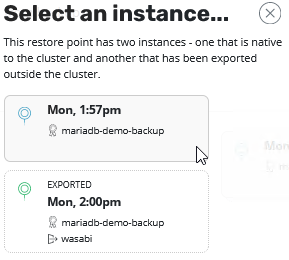
We select one of this restore points and a new window opens, where we need to select which instance of a restore point should be selected. One restorepoint but two instances? Yes because we created a backup and exported this backup to object storage. So basically we have the choise to restore a Backup(Snapshot) or restore the content from object storage. You can imagine that restoring a snapshot is much faster than restoring the exported content, but in some cases you need to restore such exported backups .

Now we can set some restore options. You can restore this application in its original namespace, other namespace or create a new namespace as well.
This is how you can use Kasten K10 for cloning an complete application to a new namespace.
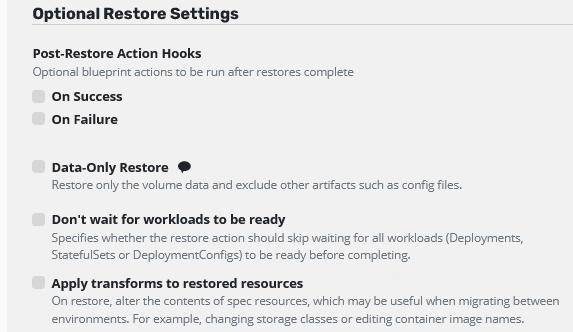
If your restore is done, you can add Post-Restore Action Hooks. This Hooks using the same blueprint action like e.g. we used for backup. Maybe you need to reconfigure your application after restore automatically, this is your solution.
You can select only to restore the volume data and not the Kubernetes objects.
You can also apply transforms to the restore resources. You can e.g. change your storage class while restoring because maybe you want to move your data to a new storage class.

Because we started to restore everything and not only the data volumes be can (de-)select every spec artifact. Maybe we needed to change e.g. an configmap and don’t want to restore the old configmap.
After reviewing this you can proceed with “Restore”.

Now we get an “Really???” message to confirm to start the restore.
Now you can switch back to the Dashboard and scroll down a little bit. Now you can see the running Restore. If your last box in the chart is Blue the restore is running and when it’s grey it has finished. You can hover the box with your mouse and see the details.

Thank you for reading my blog series about creating my Kubernetes homelab. After the homelab is now up and prepared to make some product demonstrations I think my series is finished, but of cause I would write from time to time addional blog posts about Kubernetes and Kasten K10

